Yummy Battenberg Recipe!

Yummy Battenberg Recipe!

Hello everybody!

Wow I’ve had a long break from blogging… post on that very soon! But I thought I would pop on a wonderful little recipe for battenberg cake which I made today. Enjoy!

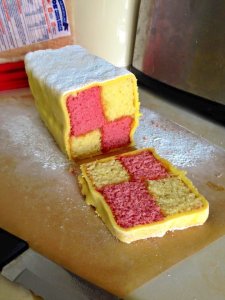
11813404_10155984976555232_9117894140634108136_n

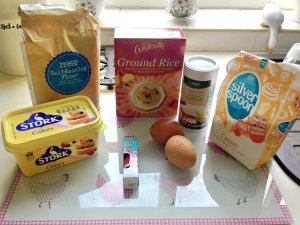
Ingredients

4oz softened butter

4oz caster sugar

4oz self raising flour

2 large eggs

1 tsp baking powder

2oz ground rice

Red food colouring

Almond paste if desired

 11836859_10155984978970232_4849462198745708233_n

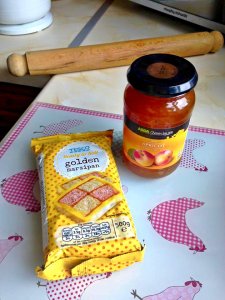
Apricot jam

Marzipan

Icing sugar

11846680_10155984977975232_2497332390430195723_n

  1. Preheat the oven to 160°c, and grease and line a square baking tin. The tin I use is an 18cm square tin, not too deep.
  2. Add the butter, sugar, flour, eggs, baking powder and ground rice into a mixing bowl and beat for about two minutes, or until it is smooth. Have a boogie to Beyoncé as you beat the mixture, it’ll go quick as a flash.
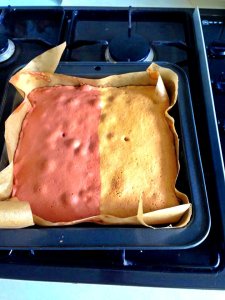
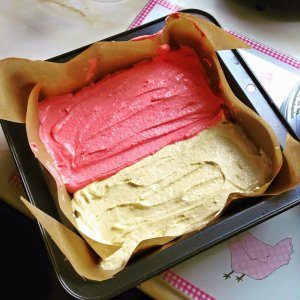
  3. Split the mixture in half. Put half of the mixture carefully onto the right side of your baking tray.
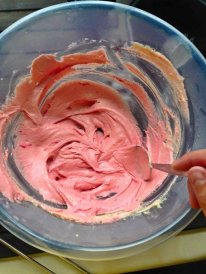
  4. Add a few drops of red food colouring into the mixture you have left in the bowl. Mix it until it is a deep pink colour. If you were really fun you could mix things up and have some different coloured sponge in your Battenberg; go wild you only live once.

    11060840_10155984978825232_7030782698005069149_n

  5. Carefully spoon this mixture onto the other side of the tin, make sure the line between the two colours is smooth, and make sure your mixture is even. Smooth over the surface.
    11836871_10155984978220232_7842948904799833699_n
  6. Pop it into the oven and bake for about 35-40mins. Once it is cooked, check it springs back when touched, and maybe try the skewer test like I did. Leave it to cool for a few minutes in the tin, then put it on a cooling tray to fully cool down. Remove baking paper.

    11831730_10155984978040232_3502556266851995200_n

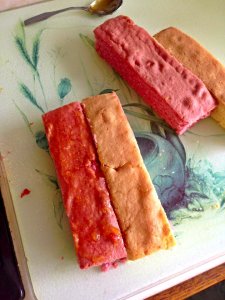
  7. Once your sponge is cool, trim the sides and cut it down the middle so you have two sponges each a different colour. Then cut the sponges in half again, so you have four long pieces of sponge, two of each colour.
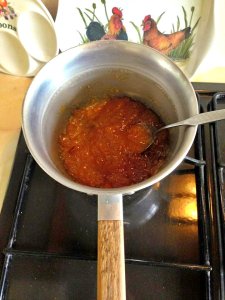
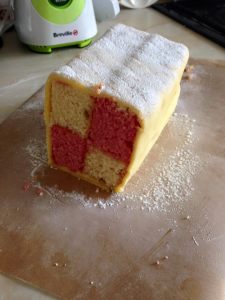
  8. Warm the jam in a pan, and use this to stick your sponges together in a checkerboard style. Pop some jam on the top of the sponge, ready for the marzipan.

    11214718_10155984977855232_4424439127241191776_n11822652_10155984977520232_9084499800895142150_n

  9. Sprinkle some icing sugar on your surface, and roll out you marzipan. This can be tricky and I had a small disaster when my marzipan decided to stick completely to the surface. After wailing for a moment I was handed a scraper to scrape it off the surface and start again. Dust your surface well.
  10. Once rolled out, pop your sponge on one side of the marzipan, then wrap the marxipan round the cake. Make sure you pinch the corners and edge so it stays together.
    11825992_10155984976095232_4445247737491085930_n
  11. As a finishing touch, you could score a pattern on the top of the Battenberg, or sprinkle some icing sugar on top.
  12. Pop the kettle on, call your mates and have a gossip with a lovely cup of tea and some yummy Battenberg, and listen as your friends shower you with baking compliments. Job done.

11813404_10155984976555232_9117894140634108136_n

NOMMY.

86023b97d405648c3ce8da78114ed98d

Love Sophie xx

Healthy Flapjacks – Perfect For Lunchboxes

Healthy Flapjacks – Perfect For Lunchboxes

So when I lived in Australia, I used to make these flapjack bars ALL THE TIME. They’re such a good way of piling in fruits and seeds into a yummy bar. The kiddies I used to look after loved them and always wanted more! We’d have so much fun thinking about what ingredients to use and it’s so exciting experimenting with flavours together!

13108_10155476960515232_8091890604796759903_n

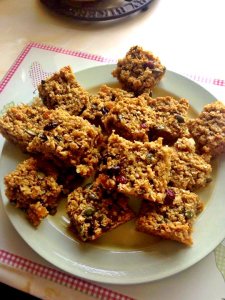
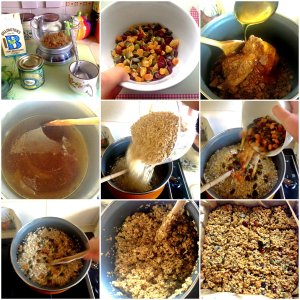
You can use any array of dried fruits/nuts/seeds, whatever you fancy really, this time I opted for dried apricots, dried cranberries and pumpkin seeds, so lots of energy to get the brain and body warmed up!

The method is pretty simple, just remember you need to melt the butter, syrup and sugar on a low heat, you don’t want to burn it!

Have fun!

BeFunky Collage

Ingredients:

200g butter (I used dairy free butter but you can use either)
150g light muscovado sugar
100g golden syrup
350g oats
100-150g chopped dried fruits/nuts/seeds

Method:

Melt the butter, sugar and syrup in a pan (you could microwave it if you like, whatever suits!) slowly, stir as it melts.
Once it has all melted and dissolved, take it off the heat.
Pour in the oats and the dried fruits/nuts/seeds and mix well.
Make sure all the oats are covered and the syrup is mixed well throughout all the ingredients.
Press into a lined/greased tin (I used a 12 x 8” tin) and bake for about 25 minutes at 180°C.
Let it cool in the tin for about 10-15 minutes before cutting it into bars.

Some yummy ideas for other fillings:

Coconut and a sprinkling of dark chocolate
Dried cranberries and white chocolate chunks
Almonds and sunflower seeds
Banana chips, crumbled pecans and chopped fudge
Tropical mix – dried pineapple and coconut
Coconut and dried raspberries or cranberries
Glacé cherries and sliced almonds

So have lots of fun making these whether it be with your kiddies or just a treat for yourself or a treat for your lunchbox, and feel free to show me 😀

Love,

Sophie xx

Marvellous Marble Cake!

Marvellous Marble Cake!

So this cake came about when I was feeling a little bit sorry for myself, and needed something scrummy to have with a nice cup of tea. It’s so unbelievably easy to make, and even yummier to eat! The prep time is only about 10-15 minutes, and it takes less than an hour to cook. So you could pop it in the oven and then have a lovely bath while you wait for it to cook!

10993405_10155290546940232_2399766205921911127_n 11018737_10155290546765232_463264519461164410_n

What you will need:
Weighing scales
Mixing bowl x 2 (you will split the mixture into two halves later)
Electric whisk or metal spoon*
2 spoons
Skewer

Ingredients
8oz butter
8oz caster sugar
4 medium eggs
8oz self-raising flour
3 tbsp milk
1 tsp vanilla extract
2 tbsp cocoa powder

Method
1. Heat oven to 180C/Gas 160/gas mark 4.
Grease and line a 20cm cake tin with greaseproof paper.

2. I am a firm believer in the all in one method, so if you are similar to me, pop all the ingredients except the cocoa into a mixing bowl and combine. You can use an electric whisk if you are lazy like me, or be a badass and do it by hand.

(If you are a bit more careful and would prefer not to pop all the ingredients at once, beat the sugar and butter until light and fluffy, then add the eggs one at a time making sure they’re well mixed. Add the milk and vanilla extract, then fold in the flour.)
Whichever method you choose, make sure your mixture is smooth.

3. Divide the mixture between 2 bowls.
Stir the cocoa into one of the mixtures until nicely combined.

11006423_10155290547610232_5513866106531466589_n

4. Take 2 spoons and dollop the vanilla mixture and cocoa mixture into the cake tin alternately. When you have used up all your mixture, tap the bottom of the cake tin on your work surface. This makes sure your mixture evenly covers the bottom of the tin, as well as getting rid of any air bubbles.

5. Use a skewer and swirl it around your mixture, this will create a marbled effect.

11001926_10155290547430232_5807158132341909517_n

6. Bake your cake for 45-55 minutes. When you think it’s done, pop your skewer in the middle of the cake and if it comes out clean, it’s ready! Quick, pop it on a rack so it cools and you can eat it! Nom.

I really hope you enjoy this recipe and if you’d like me to post more please comment and I will be super happy to!!

Love Sophie xxx